App registration
To be able to use SSO with Microsoft Entra ID, you must first register a new app. To do this, use the ’App registrations’ service. A new app can be registered via ’New registration.’
The registration of a new app requires a name and details of the supported account types.
Select the type ’Web’ as the redirection URI and enter the following URI first:
https://<DOMAIN>/signoSignUniversal/auth/callback?client_name=viewerClient
Replace the placeholder ’<DOMAIN>’ with the domain under which you operate signoSign/Universal. If you use the ’web.ssmpublicurl’ property on the signoSign/Universal server, these domains must match.
Please note that Microsoft only allows URIs with valid and verifiable TLS certificates (no self-signed certificates). However, an (unprotected) ’localhost’ address can also be used for test purposes.
Then confirm your selection with ’Register.’

Further redirection URIs
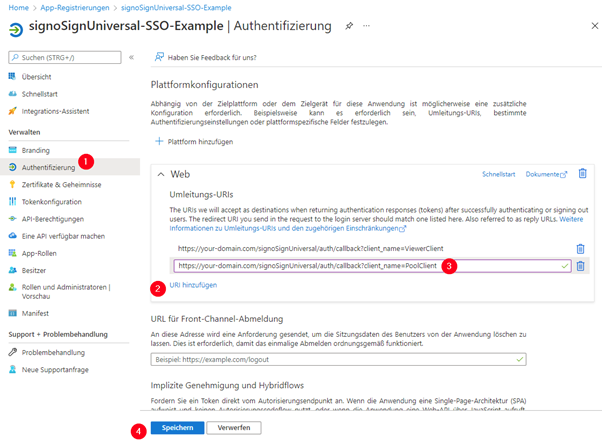
Once the app registration has been created, switch to the ’Authentication’ section.
On the right-hand side, you will see the redirection URI you have just configured. Click on ’Add URI’ and enter the following additional URI:
https://<DOMAIN>/signoSignUniversal/auth/callback?client_name=PoolClient
Replace the placeholder ’<DOMAIN>’ with the domain under which you operate signoSign/Universal. If you use the ’web.ssmpublicurl’ property on the signoSign/Universal server, these domains must match.
Again, please note that Microsoft only allows URIs with valid and verifiable TLS certificates (no self-signed certificates). However, an (unprotected) ’localhost’ address can also be used for test purposes.
Click ’Save’ to accept the entry.
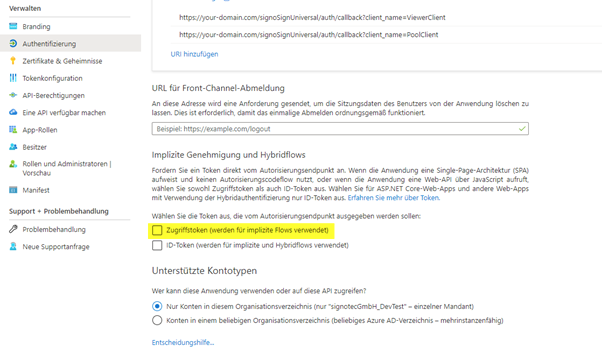
Optional: Access tokens for implicit flows
In the app registration under ’Authentication’ the option ’Access tokens (used for implicit flows)’ can be enabled under ’Implicit approval and hybrid flows.’
This setting is optional and can be used to authorize yourself to the signoSign/Universal REST API using a specific OpenID Connect flow. It can also be used, for example, if you want to create an access token with OpenID Connect Debugger.
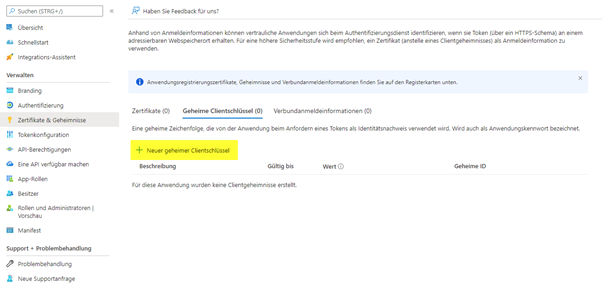
Creation of a secret
In the app registration, switch to the ’Certificates and secrets’ section. There, click ’New secret key.’ The key requires a description and a validity period.
The created secret is visible under ’Value’ after creation.
Please save this value for later use, as it cannot be made visible again!
Configuration of the token
The next step is to configure the token, as signoSign/Universal needs to know the user’s email address. To configure the token, switch to the ’Token configuration’ section within the app registration.
On the right-hand side, select ’Add optional claim.’

Select ’Access’ as the ’Token type’ and enable ’email’ in the list of claims.
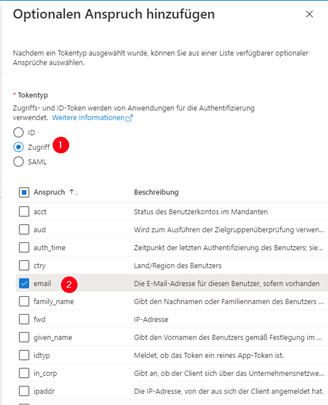
Then click ’Add’ to confirm your selection.
The following dialog appears:
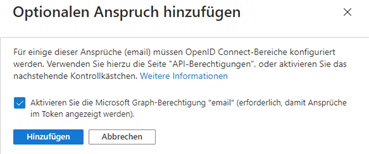
Enable the checkbox ’Enable Microsoft Graph authorization ’email’ (required for claims to be displayed in the token).’ and then click ’Add.’
Make API available
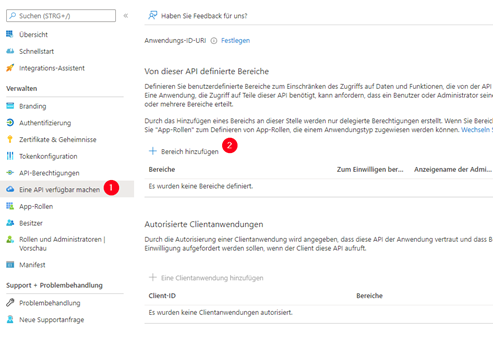
The next step is to configure a custom area for the API. To do this, go to the ’Make an API available’ menu and click on ’Add area’ on the right. This custom area is required so that signoSign/Universal can access the required user information.
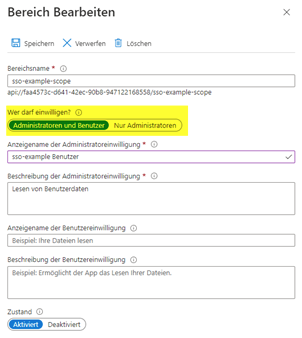
An application URI, an area name, and display names and descriptions must be configured. The content is the responsibility of the administrator and is irrelevant for signoSign/Universal. It also determines who is authorized to release this information. Here it is important that ’Administrators and users’ is selected.
Configure signoSign/Universal roles
signoSign/Universal requires specific user roles that must be linked to the users.
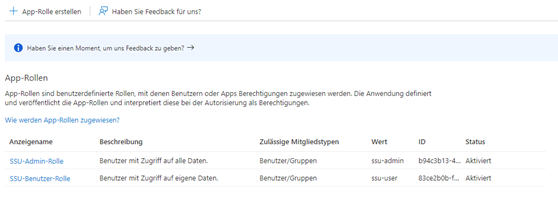
To create the roles, switch to the ’App roles’ area and click ’Create app role.’
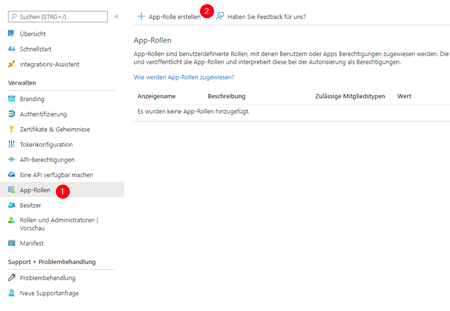
The app role requires a display name and the permitted member types. The display name is purely for administrative purposes and is irrelevant for signoSign/Universal. Select ’Users/groups’ as the permitted member type so that the role can be linked to users or groups in the next step.
The role of signoSign/Universal must be used as the ’value’ for the role. There are currently two roles.
-
ssu-user
-
ssu-admin
The role ’ssu-user’ must be assigned to every normal user. These users only have access to their own documents and processes. The ’ssu-admin’ role, on the other hand, has access to all documents and processes of all users.
Assignment of roles
The last step is to assign the created roles to your users or groups.
To do this, switch to ’Company applications’ and select the created application there.
There, switch to ’Users and groups’ in the menu.

You can use ’Add user/group’ to select a user or group and link it to one of the roles created. Please note that the assignment of groups is only available in certain Microsoft Entra ID plans.
The configuration in Microsoft Entra ID is then complete and you can configure the created application in signoSign/Universal.
signoSign/Universal takes over the roles from the claim defined via the setting
auth.oidc.rolesClaim.
Registration only with mapped role (optional)
The following option is optional, but is recommended to simplify error handling.
To ensure that Microsoft Entra ID only allows users with a mapped role to log in, the ’Assignment required?’ option must be enabled. To do this, go to the ’Properties’ menu and enable it.
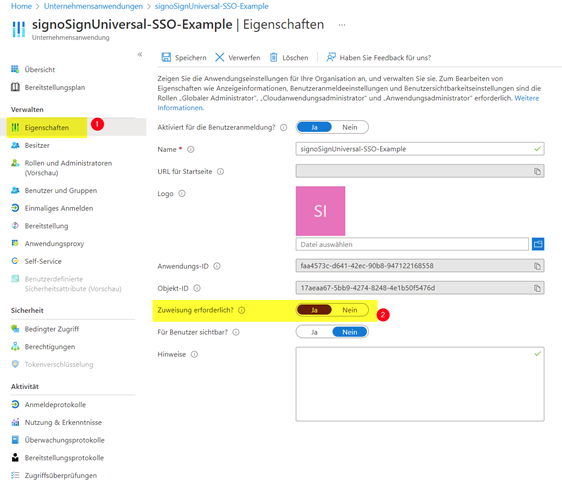
Making the app visible to users
If you want users to see the app within ’My apps’ in Office 365, you can set the option ’Visible to users?’ to ’Yes.’
To access the app, the ‘URL of the start page‘ must be set to the URL of the application in the app registration under ’Branding & properties’ (e.g. https://YOUR-DOMAIN. COM/signoSignUniversal/pool).